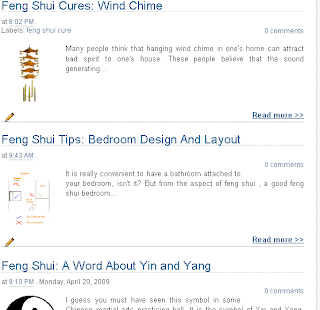
Here's how it is done.
Log in to your blogger account. Click on the Layout tab, followed by Edit HTML tab and then click on the square beside Expand Widget Templates.
Search for this code:
and replace it with :</head>
<script type='text/javascript'>Next, look for this code:
var thumbnail_mode = "float" ;
summary_noimg = 240;
summary_img = 150;
img_thumb_height = 100;
img_thumb_width = 100;
</script>
<script src='http://blogergadgets.googlecode.com/files/excerpt.js'
type='text/javascript'/>
</head>
And copy the following code in its place:<data:post.body/>
<b:if cond='data:blog.pageType == "item"'>
<data:post.body/>
<b:else/>
<div expr:id='"summary" + data:post.id'>
<data:post.body/>
</div>
<script type='text/javascript'>
createSummaryAndThumb("summary<data:post.id/>");
</script>
<div style='clear: both;'/>
<span style='padding-top:5px;;float:right;text-align:right;'>
<a expr:href='data:post.url'
rel='bookmark'><b>Read more >></b></a></span>
</b:if>
Save it and you will have the post summaries with thumbnails appear automatically in your homepage,label pages, archive and search results.
You can also make further customization to the first part of the code.
1. thumbnail_mode var = “float”; - Thumbnail will appear above post summary
2. summary_noimg = 240; - No of characters to be shown in summary when there is no picture.
3. summary_img = 150; - No of characters to be shown in the summaries with pictures
4. img_thumb_height = 100; - Post thumbnail height adjustment.
5. img_thumb_width = 100; - Post with thumbnail width adjustment.
